Best EVER Brownies

Hello everyone and welcome,

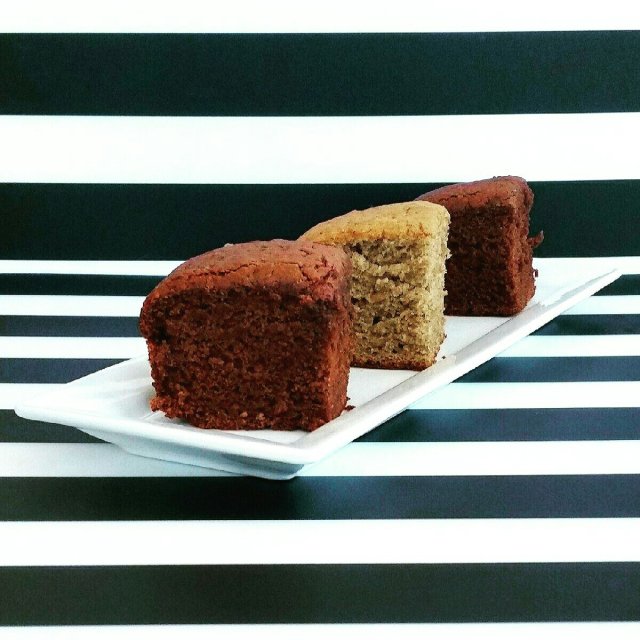
Today I’m going to share my Best Ever Brownie recipe with you. If you wanna take your brownies up a notch….you’re going to love this recipe. It’s rich-chocolatey-fudgy-nutrient rich, goodness.

So a few weeks back I’m in my local organic market and I stumble upon fermented cacao. I flip the bag over and read the ingredients and nutrient content and it was at this moment I fell in love.

What’s not to love it’s fermented, my latest obsession, it’s chocolate which has always been an obsession, it’s packed full of nutrients and no toxic chemicals, my forever obsessions. After using this cacao I just can’t go back to cacao that’s not fermented. This richness and taste are incredible.

Now with all that being said….let’s get into the reason your here…..the recipe.

Ingredients:

1 1/4 C organic coconut palm sugar
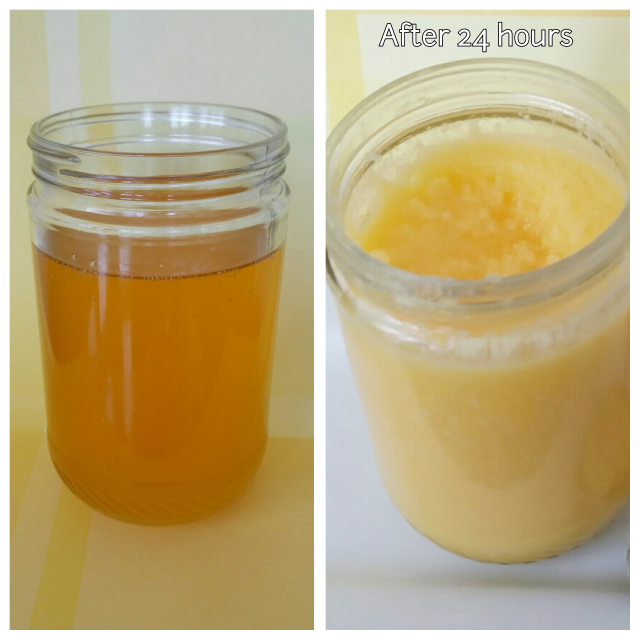
1/2 C organic grass-fed melted butter ( coconut oil as a vegan option)
2 organic eggs ( or vegan alternatives of choice)

1/3 C organic fermented cacao powder
1/2 C organic sprouted spelt flour
1/4 tsp pink Himalayan salt
1/2 tsp baking powder
1 tsp organic moringa leaf powder (optional)

Method:

  1. Preheat oven to 350°.
  2. Oil or butter and flour brownie pan.
  3. Mix eggs and sugar until nice and fluffy. Next add butter, mix to incorporate. Sift in flour, cacao, salt, baking powder and moringa leaf powder, mix until smooth.
  4. Add brownie batter to greased and floured brownie pan. Bake @350° for 25-30 minutes.

Let cool and enjoy!

Now let’s talk about all the nutrient goodness of this recipe. The cacao is loaded with nutrient goodness such as potassium, magnesium, calcium, iron, and has a deeper, richer chocolate flavor.

I like to add different herbs to my desserts just to give it added nutrients without my family being able to detect the taste and it works wonderfully.

Here are just some of the benefits of moringa leaves.

Now that I’ve shared my Best EVER Brownie recipe with you, I hope you will give this recipe a try and enjoy it as much as my family and I do.

Thank you so much for taking the time to stop by, I greatly appreciate it.

Instagram // Pinterest // Twitter

Until Next Time,

Sewloveable

The Best Ever Banana Bread

Hello everyone and welcome,

A little over a month ago one of my favorite sewing bloggers Tabitha Sewer displayed her cooking and baking talents on Instagram. She was making all sorts of dishes from Joanna Gaines latest cookbook Magnolia Table.

It was the moment that she made the After-School Banana Bread for the 2nd time and repeatedly said this is the Best Banana Bread I’ve ever had, that I had to have this cookbook. I had to see for myself. I purchased the cookbook on a Sunday and baked the Banana Bread that Monday.

Let me tell you something. This is the Best Banana Bread I’ve ever had.

In Sewloveable style, I did my own adaptation of this recipe and my family and I devoured the Banana Bread and they said. … this is the Best Banana Bread you’ve ever made.

Now, this brings me true joy because my family is very picky, so to win over their taste buds is no easy task. Here is another victory for the books!

Now let’s get into the good stuff, the recipe.

Ingredients:

1 3/4 C organic sprouted spelt flour

1 tsp baking soda

1/2 tsp sea salt

1/2 tsp organic soursop leaf powder (*optional)

4 Tbsp melted organic grass-fed butter

3/4 C organic turbinado sugar

4 ripe organic bananas

2 large organic eggs

Chocolate Banana Bread

1 1/2 C organic sprouted spelt flour

1/4 C organic cacao powder

1 tsp baking soda

1/2 tsp sea salt

1/2 tsp organic soursop leaf powder (*optional)

4 Tbsp melted organic grass-fed butter

2/3 C organic turbinado sugar

4 ripe organic bananas

2 large organic eggs

Method:

Preheat oven to 350°

Grease and flour an 8×8 baking pan or line with parchment paper.

In a large bowl or stand mixer add you bananas and mix until smooth. Next add your sugar, butter, eggs and blend until everything is incorporated.

In a medium bowl whisk together flour, baking soda, salt, sour sop powder, and cacao powder( if you’re making the chocolate version.)

Add the dry ingredients into the wet. Mix until just combined.

Pour and spread mixture into your baking dish and bake for 45-50 minutes.

Once cooled cut and enjoy the Best Ever Banana Bread!

I hope you will give this recipe a try and to see why I add soursop leaves, please check out my last post here.

Thank you so much for taking the time to stop by, I greatly appreciate it.

Instagram // Pinterest // Twitter

Until Next Time,

Sewloveable

Quick & Easy Crumb Cake

Hello everyone,

If you’re looking for a quick and easy sweet treat. This is the recipe for you. The best part of this recipe is it’s great for breakfast with tea or coffee, brunch or as a dessert. My family lovesssssss this cake. So, of course, I had to share it with you.

Let’s dive right in and start baking!

Ingredients:

Crumb Topping:

1/4 C organic cane sugar

1/4 C organic sprouted spelt flour

3 Tbsp organic grass-fed butter (cut into small pieces)

1/2 tsp organic cinnamon

Cake:

1 1/2 C organic sprouted spelt flour

1 organic egg

3/4 C organic almond milk

2/3 C organic cane sugar

1/4 C organic grass-fed butter (melted) or ghee

2 tsp aluminum free baking powder

1 tsp cinnamon

1/2 tsp soursop leaf powder (*optional….this is my way of adding in nutrients without the family detecting )

1/2 tsp sea salt

Instructions:

Preheat oven to 375°

Butter and flour an 8×8 baking pan.

In a medium bowl add your crumb topping ingredients. Mix together until everything resembles crumbs. Set aside.

In a large bowl with a stand or hand mixer. Add the wet ingredients, sugar, milk, butter, and egg. Mix until everything is evenly mixed.

Next add your dry ingredients, flour, baking powder, cinnamon, soursop leaf powder, and salt. Mix until batter is nice and smooth.

Transfer batter into baking pan, get it all smooth and level. Sprinkle on the crumb topping.

Bake for 25-30 minutes.

Whenever the family wants a sweet treat and I just want something delicious, quick and easy….this is my go to.

So let me briefly share what I love about soursop leaf. The leaves are full of nutrients, great for the lymphatic system and more. I add it to my baked goods and smoothies for its many nutrients.

Please, research more about the leaf and fruit to learn more and see if it can benefit you too.

(This is not medical advice, just me sharing one of my baking essentials for adding nutrients to my sweet treats.)

I hope you will give this recipe a try and enjoy it as much as my family does.

Thank you for taking the time to stop by I greatly appreciate it.

Instagram // Pinterest // Twitter

Until Next Time,

Sewloveable

CrockPot Pepper Steak

Hello everyone and welcome,

Today, I want to share a really EASY recipe with you but before I do I want to share a little story.

When I was about 7 or 8 I tried pepper steak for the first time. A good family friend named Rosetta made it and I loved it. From that day on whenever she would make this dish on the weekend, she would call to let me know. I would run and ask my dad to drive me over. I would have such a great time at her house. We would play all sorts of board games and one of my favorite card games UNO (back then I thought I was a UNO champ) and she would let me play dress up in her clothes, shoes, and jewelry. She would have music playing and snacks to hold me over until dinner…. usually a cheese platter with an array of cheeses, crackers, nuts and a variety of fruit….my favorite.

Rosetta would tell me stories of her life and let me ask her a million questions about everything. I was a very curious kid and I needed to know EVERYTHING. When dinner was ready we would say a prayer and enjoy a wonderful homemade dinner made with love and care that was full of FLAVOR and sooooo delicious. Once dinner was over we’d watch a little t.v. and by 8 p.m. my dad would arrive to take me home. Such a lovely time.

Which brings me to this recipe. I haven’t had Peppered Steak in over 20 years but over the past few weeks I’ve been having a serious craving for it….so I just had to make it and share it with you.

Ingredients:

1 lbs organic grass-fed sirloin (thinly sliced bite size pieces)

2 cups organic peppers ( I use a frozen trio which pre-cut)

1 cup organic onion ( I like red thinly sliced)

1/4 cup organic green onion (thinly sliced)

1 cup of water

4 tbsp of my DIY seasoning

1/2 tsp sea salt

1/2 tsp -1 tsp black pepper

Method:

1. Cut the sirloin, onions, and peppers. Add to crock pot.

2. Add water, seasoning, salt and black pepper, stir to evenly incorporate all the flavors.

3. Cook on high for 3-4 hours or low for 6-8.

Once done enjoy as is or with quinoa or rice.

This dish serves 4

The sirloin is sooo tender and flavorful. A really simple recipe that yields great results.

I hope you give this recipe a try and enjoy it as much as my family and I did.

Thank you so much for taking the time to stop by.

Instagram // Pinterest // Twitter

Until Next Time,

Sewloveable

Savory Chickpea Flour Drop Biscuits (GF) With A Vegan Option

Hello everyone and welcome,

Ok, so I am now obsessed with chickpea flour thanks to this recipe. My youngest would love it if I made these biscuits every day she is a serious biscuit lover. Why haven’t I been using chickpea flour long before now? Especially when you consider all the many benefits it has to offer.

  1. Healthy gluten-free alternative
  2. High in soluble fiber
  3. Low glycemic index
  4. Healthy unsaturated fats
  5. Rich in minerals like magnesium, iron, potassium, calcium and more
  6. Rich in vitamins like B1, B6, B9
  7. Great source of protein

So now that we’ve gone over all the wonderful benefits let’s make some biscuits.

* The vegan alternative for this recipe will be listed below.

Here’s what you will need.

Ingredients:

2 C chickpea flour (cold, so that the biscuits rise properly.)

3 tsp baking powder

1 tsp Celtic or pink Himalayan salt

4 Tbsp frozen organic grass-fed butter (grated) or Ghee if desire DIY recipe here

1 C organic grass-fed buttermilk

Optional:

1 Tbs organic dried parsley flakes

1 Tbs organic dried cilantro

1 Tbs of my DIY season blend (here)

Vegan option:

2 C chickpea flour ( cold, so that the biscuit rise properly.)

3 tsp baking powder

1 tsp Celtic or pink Himalayan salt

4 Tbsp cold or frozen vegan butter (grated)

1 C organic almond milk (or milk of choice) + 1 Tbsp organic apple cider vinegar or lemon juice

Optional:

1 Tbs organic dried parsley flakes

1 Tbs organic dried cilantro

1 Tbs of my DIY season blend (here)

Method:

Recipe yield 12 biscuits

1. Preheat oven to 450°.

2. Line a baking tray with parchment paper.

3. In a large bowl add flour, baking powder, and salt. Stir to get everything evenly combined.

4. If adding herbs and seasoning, add and stir to evenly incorporate.

5. Add in the butter or vegan butter and stir to evenly distribute.

6. Add milk and mix to bring everything together.

*(For the vegan option add your vinegar or lemon juice to your milk, stir it together an add it to your dry ingredients.)

7. Using a 2″ ice cream scoop, drop your biscuits onto your lined baking tray.

8. Bake for 10-12 minutes.

When done the biscuits will be a beautiful golden brown on the bottom.

If you’ve never tried baking with chickpea flour……I really encourage you to give it a try. If you’ve been baking with chickpea flour…….why didn’t you tell me how delicious and great it is?

I hope you give this recipe and try and enjoy it as much as my family and I do.

Thank you so much for taking the time to stop by.

Instagram // Pinterest // Twitter

Until Next Time,

Sewloveable

Easy To Make Ghee

Hello everyone and welcome,

Today, you are going to see just how easy it is to make your own Ghee. For those that may be wondering……what exactly is Ghee, why would I want to make it and how does it benefit my body?

Well……..let’s dive in and find out.

What is Ghee?

Ghee is clarified butter, made from unsalted cultured butter from grass-fed cow’s with the milk proteins removed. Cultured means that it contains lactic acid due to the fermenting process.

It has a high smoke point up to 485°F, making it perfect for baking, cooking, and so much more. May I also mention it has an incredible flavor even better than butter.

Oh, and one of my favorite aspects is it does require refrigeration for up to 1 month.

For those who are lactose intolerant many can tolerate ghee due to the milk protein being removed and did I mention it is highly favored in Indian cuisine and beauty regimens and has been used for centuries.

The key to making the shortcut version of Ghee is using butter that is unsalted and cultured. Which means the cream has been “ripened” or fermented by inoculating pasteurize cream with strains of lactic bacteria (good bacteria). The cream is allowed to age for about 48 hours and then churned. The result is butter that has a rich buttery aroma and flavor.

Why make Ghee when you can buy it?

  1. It’s easy to make.
  2. You can make more for far less than store bought.
  3. You can choose the quality of butter to make it with.

What are the benefits of using Ghee?

Here are some the benefits of this liquid gold…….

  1. Great source of fat-soluble vitamins like A, D, E, & K2.
  2. The vitamin K2 in Ghee has been shown to help with bone growth, calcifications, and tooth decay.
  3. Shown to lower cholesterol and body fat.
  4. Shown to reduce inflammation.
  5. Helps with better nutrient absorption.
  6. Great for skin and hair (see how to use it here).
  7. A high smoke point of 485°.
  8. Can be kept at room temperature for 1 month and up to 1 year in the refrigerator.

Now that we’ve gone over all the details of Ghee……it’s time for the best part. Let’s make some Ghee!

Supplies:

  • A medium heavy bottom saucepan
  • 1 lb organic butter (unsalted-organic cultured or grass-fed cultured butter or it may say contains lactic acid)
  • A fine wire mesh strainer
  • A glass jar or bowl with lid for storage

Method:

  • Add your butter to your pan.
  • Melt over medium-low heat ( I set my stovetop to 4)
  • Once the butter is melted reduce heat to a simmer.
  • Let it simmer away for 35-40 minutes. (During this time, the butter will go through several stages. It will foam, bubble, this is the milk solids separating. Once the Ghee is done, it will be a lovely golden brown. The milk solids will have browned and fallen to the bottom of the pan. The foaming and bubbling will stop your ghee is done.)
  • Allow it to cool for 5 minutes, pour your ghee into the glass container using a fine mesh strainer to catch all the milk solids.
  • Your ghee can be used right away….it will be in liquid form at this point but if you let it sit overnight it will be a nice creamy spreadable texture.
  • Ghee is far richer in flavor than butter, so a little goes a long way. It can be used in place of cooking oil to meet all your cooking and baking needs.

The stages of making ghee.

I hope you will give this recipe a try and enjoy it as much as my family, friends and I do. Please feel free to let me know, how you and the people in your life enjoyed it as well.

Thank you so much for taking the time to stop by.

Instagram // Pinterest // Twitter

Until Next Time,

Sewloveable

Vegan CrockPot Red Bean & Rice

Hello everyone and welcome,

A few days ago a friend of mine mentioned that she was in the mood to cook Red Beans & Rice.  My reply was that sounds delicious! So I decided that this dish would be included in my weekly meal planning.  For the past month, I have been deciding what dishes I will make for the week and make my grocery list based on the meals for that week.  WHHHYYYYYY haven’t I been doing this all along?  It makes life sooooo much easier from the shopping to preparing the meals.

Back to this dish so my friend hates crockpots and I LOVEEEEEEEE cooking in the crockpot and I cook in it as often as I can. For me, it takes the fuss or stress out of cooking. For her, she says her food never comes out the way she wants it to.  Thank goodness that never been my experience. So a few day’s later I mention to my friend that I am going to make the Red Bean & Rice and she made a suggestion that I knew would make this dish magnificent. She said to add a bit of that jerk seasoning that you love so much. At that very moment, I knew exactly how I was going to make them and I felt certain that they would taste amazing!

Fast forward……….this dish turned out even better than I envisioned and now it’s time to share.

Ingredients:

1 lbs organic kidney beans ( dry beans)

6 C spring water + 6 Tbsp of my DIY broth mix or organic veggie broth

4 stalks of organic celery, chopped

1 medium organic red onion, finely chopped

1 cup chopped organic red, yellow and green pepper

1 Tbsp grapeseed or avocado oil

2 Tbsp dried organic sage

1 Tbsp organic jerk seasoning ( my family LOVES Frontier brand)

2 organic Bay leaves

2 tsp Pink Himalayan salt

a pinch of baking soda (frontier brand or Bob’s Red Mill)

For the rice prepare 6 cups according to package directions


Method:

(6-8 Servings)

  1. The night before, place your beans in a large pot and fill with cool water to cover the beans by a few inches. Cover and let the beans soak overnight.
  2. Drain the soaked beans in a colander and rinse with fresh, cool water. Add the rinsed beans to the crockpot. Next add the veggies, broth, salt, seasonings/spices, baking soda, and stir to evenly mix everything.
  3. Set crockpot on low for 8-10 hours or high for 6.  I prefer low for 10 hours. Serve with rice and a garnish of choice!


the best

Now you can enjoy your delicious labor of love!

Thank you so much for taking the time to stop by, I greatly appreciate it.

Instagram // Pinterest // Twitter

Until Next Time,

Sewloveable


Bath Pulls Toxins Out, Improves Muscle and Nerve Function, Reduces Inflammation and Improves Blood Flow

Hello everyone and welcome,

Today I wanted to share an article that I thoroughly enjoyed and I thought you would too. As a part of my weekly self-care routine, I LOVE a detox/nourishing bath a couple times a week before bed. It’s so relaxing and rejuvenating and I find that I sleep so much deeper when I take them.

I do my best to be very consistent as this was a pledge to myself for better self-care. It helps to ease the stress of life and strengthen me to take on another day. We all owe it to ourselves to invest time to do things like this for ourselves ON A REGULAR BASIS…..because it truly is a necessity. Besides who doesn’t want to feel relaxed and rejuvenated.

One of my favorite recipes to use is……..

1/2 C Magnesium Chloride Flakes (better quality than Epsom salt)

1/4 C Pink Himalayan Salt

4 drops organic lavender essential oil

4 drops organic ylang-ylang essential oil

1 Tbsp organic extra virgin olive oil

20171113_133823353330919.png

This bath is so relaxing and enjoyable. I sleep deeper and wake up energized ready to tackle the day!

To find out more benefits of baths like this check out the article below.

https://www.healthnutnews.com/bath-pulls-toxins-improves-muscle-nerve-function-reduces-inflammation-improves-blood-flow/

I hope you enjoyed the article shared within this post and that you will give the bath a try and give yourself some much-needed pampering.

Thank you for taking the time to stop by and here’s wishing you excellent health and wellness!

Instagram // Pinterest // Twitter

Until Next Time,

Sewloveable

How To Make Organic Vegan Glazed Pumpkin Scones

Hello everyone and welcome,

I have been wanting to try my hand at making scones for a while now. I wanted to try something I’ve never tried before. So I mention to my daughter’s that I am going to give scones a try and they are quite excited about it……until I say I am going to make Pumpkin Scones. The looks on their faces went from excited to thoroughly disappointed in a matter of seconds.

Those looks slightly discouraged me but I was determined to try and change their minds on their view of pumpkin. I love pumpkin everything. So I like to encourage them to just try and taste thing’s they ordinarily would not.

In the end, my oldest is just not a fan of anything pumpkin but my youngest who was the biggest skeptic……..now LOVES Pumpkin Scones! Which may mean she will be more open to pumpkin flavored items in the future. To win them both over is a wonderful victory but for today I am happy to win over, at least, one of them!

image

Onto the recipe……….

Ingredients:

3 C organic spelt flour or AP

1 C organic pumpkin puree

1/3 C organic cane sugar

1/2 tsp baking soda

2  1/2 tsp baking powder

6 Tbsp organic vegetable shortening ( broken into small pieces)

1  1/4 C organic unsweetened plain almond milk

1 Tbsp organic distilled white vinegar

2 Tbsp vanilla extract

1/2 tsp pink Himalayan sea salt

2 Tbs organic cinnamon

1/2 tsp organic nutmeg

1/4 tsp organic clove

Glaze:

2  1/4 C organic powdered sugar

2 Tbsp + 1/4 tsp filtered water

Method:

1. Preheat oven to 425 degrees

2. Line a baking sheet with parchment paper.

3. Add your vinegar to your almond milk, stir and set aside.

4. In a large mixing bowl, combine your flour, sugar, baking powder, baking soda, salt, cinnamon, ginger, nutmeg, and clove.

5. Add your vegetable shortening to your flour mixture (aka dry ingredients.) Using your hands work it in thoroughly until your consistency is that of somewhat fine breadcrumbs.

6. Make a well in the center of your dry ingredients.  Pour your milk, pumpkin puree, and vanilla extract into the well you created. Using a spatula or your hands combine until all your dry ingredients are wet.  No kneading.

7. Turn your dough out onto a floured surface. This is a wet and sticky dough. Gently pat the dough out using your hands. It should be about 1″ thick. Using a biscuit cutter, cut out your scones and place them onto your parchment lined baking sheet. Gather your remaining dough and continue…..just don’t knead too much.

8. Place into your oven to bake for 12 minutes, or until lightly browned. Allow them to cool for 15 minutes on the baking sheet before you glaze them.

9. While the scones cool, make your glaze by adding the powdered sugar and water into a bowl and mixing together (*optional add a splash of vanilla extract if you desire.) Dip the tops of your scone in the glaze and place back on your baking sheet.

Now it’s time to enjoy your labor of love!

image

Thank you so much for taking the time to stop by, I greatly appreciate it.

Instagram // Pinterest // Twitter

Until Next Time,

Sewloveable


The great nutrient collapse

Hello everyone and welcome,

More and more people are waking up to the need to eat healthier. We all want to feel good and live full lives. To do so we change our lifestyles for the better. Could these lifestyle changes be suffering because our food is lacking in the nutrients it once had or should have?

Check out the article linked below to see just what I’m talking about.

http://www.politico.com/agenda/story/2017/09/13/food-nutrients-carbon-dioxide-000511

I found it quite interesting and I hope you did as well. I would love to know your perspective on it. So please feel free to share your thoughts!

Thanks so much for stopping by. I greatly appreciate it!

Until Next Time,

Instagram // Pinterest // Twitter

Sewloveable